How to build a custom keyboard In the previous article, we generated our own positioning board through CASE BUILDER, and modified the positioning board to fit the shape of the TOP MOUNT structure in CAD software.
This article describes how to set up the keyboard matrix generation configuration file
how to build a custom keyboard Matrix generation configuration file, we are going to generate keyboard configuration files in JSON format in Keyboard Firmware Builder, which is very important! ! !
What is the json file for?
To put it simply, it has a function of up and down, let’s talk about it in a few points
1. It can configure the matrix of your keyboard. This is a number on the XY axis. Rows and columns are counted from 0. For example, ROW 3 COL 4 refers to the 4th row and 5th column. It is found that this is “F” The position of the key, when you press the F key, the command received by the PC is the coordinate ROW3 COL4, and then the corresponding is the F key.
2 .Why is it said that it works from top to bottom, because from here, we have already prepared for the next step of drawing the PCB. With rows and columns, we can know how to draw the schematic diagram of your PCB
3. Define your key value, that is, which key is what number or letter
4. Adjust the row and column corresponding to the main control chip pin
5. Generate the HEX suffix file for the final firmware flashing
How to Build a Custom Keyboard Firmware Generation
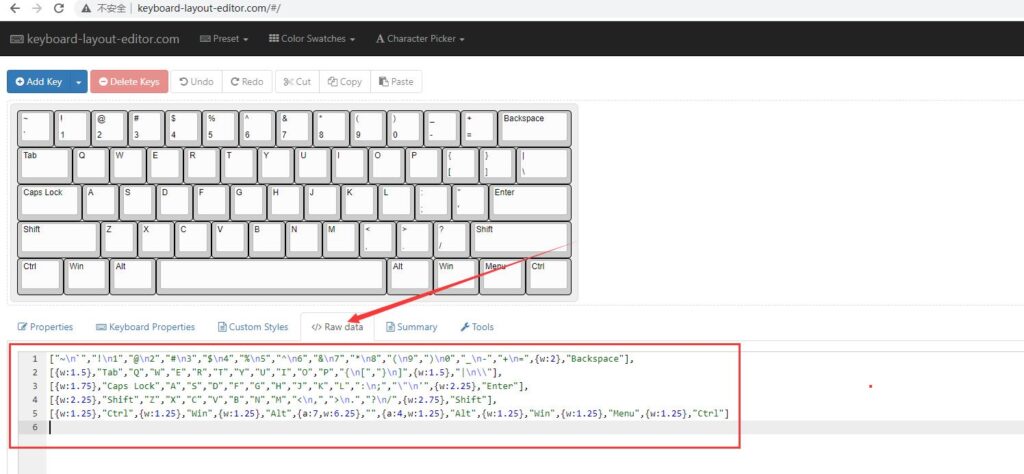

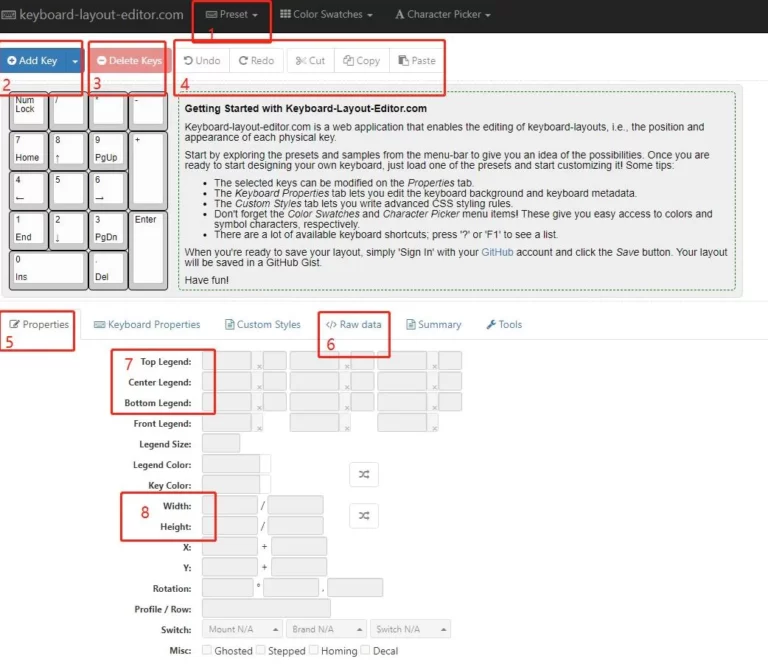
Import the arrangement code generated on keyboard-layout-editor.com, copy the code into the red box, and then click Import to import, and you will reach this interface

Keyboard Firmware Builder function explanation
1.Matrix diagram,
by adjusting the values of ROW and COL, it will look neater, so that it will be clearer when making the PCB schematic diagram.
2, is the row ROW value we just mentioned
3.COL value
4.Select row to column or column to row, this should be the same as the order in the schematic diagram, you don’t need to modify it.
5.PINS
The pin numbers of the main control chip corresponding to all the rows and columns of CAPS LOCK RGB lights are adjusted here

Control chip
ATMEGA32U4 This is the main control chip used in our keyboard PCB
The numbers that can be adjusted behind ROW COL are the corresponding pin numbers on the 32U4 chip. After drawing the schematic diagram, follow the corresponding pin numbers on the schematic diagram and adjust them here.
CONFIGURE LED PINS
Which pin is the light on the keyboard
NUM LOCK
Lock light for the numeric keypad
CAPSLOCK
It is the caps lock light, this requires a pin number
WS2812:
The pin number occupied by the LED light row, this should be consistent with the schematic diagram
6.KEYMAP:
Set the key value. Here it should be explained that the key value is layered. Generally, there are two layers, 0 layer and 1 layer.
7.8.is not very clear at the moment, if you know, please add··············
9.SETTINGS
set your keyboard name here

Layout Name
Your keyboard name (the name of the keyboard displayed in the small window that pops up after plugging it into the computer)
Bootloader size:
the default is 4096kb
WS2812 LEDs :
The number of LED lights, usually there are as many LED lights as there are keys on your keyboard, so just fill in the number of your keys here
Backlight LEVELS:
Default 3
Save Configuration
save a file in json format, this file should be saved well, and you can directly upload your json file when you come here to adjust next time, so you don’t need to reset and adjust it again.
10 COMPILE

Generate a hex format file with the current settings. After completing the PCB, when flashing the firmware, use qmktools to flash this file into your main control chip. This is flashing the firmware.
Ok-This is the end~ Adjust the keyboard matrix to generate JSON and HEX files, and the basic explanation has been completed